As a Microsoft fellow, I was offered a BizSpark account. This account is intended to help early stage start-ups or non-profits. With the account I get $150 a month for free from Microsoft to run Azure cloud-based services. This is all fantastic, but I have been an Amazon AWS user in the past and have no experience with Azure and Microsoft cloud services. Thus, I am writing this blog to document my first foray into Azure for the purposes of both self-reference and to help anyone else who is my position (a Mac user who wants to do stuff with Azure).
My first goal will be to set up a SQL server on the Azure SQL Server service. Problem number one is that I do not have a Windows OS computer so I can’t download or run the Visual Studio GUI tools that assist. As a result, I will have to do all my management through the command line interface (CLI). This isn’t a big deal and actually preferable as I think that this will help me better understand the tools available and perhaps gain more insight into the service than if I were to use the graphical interface.
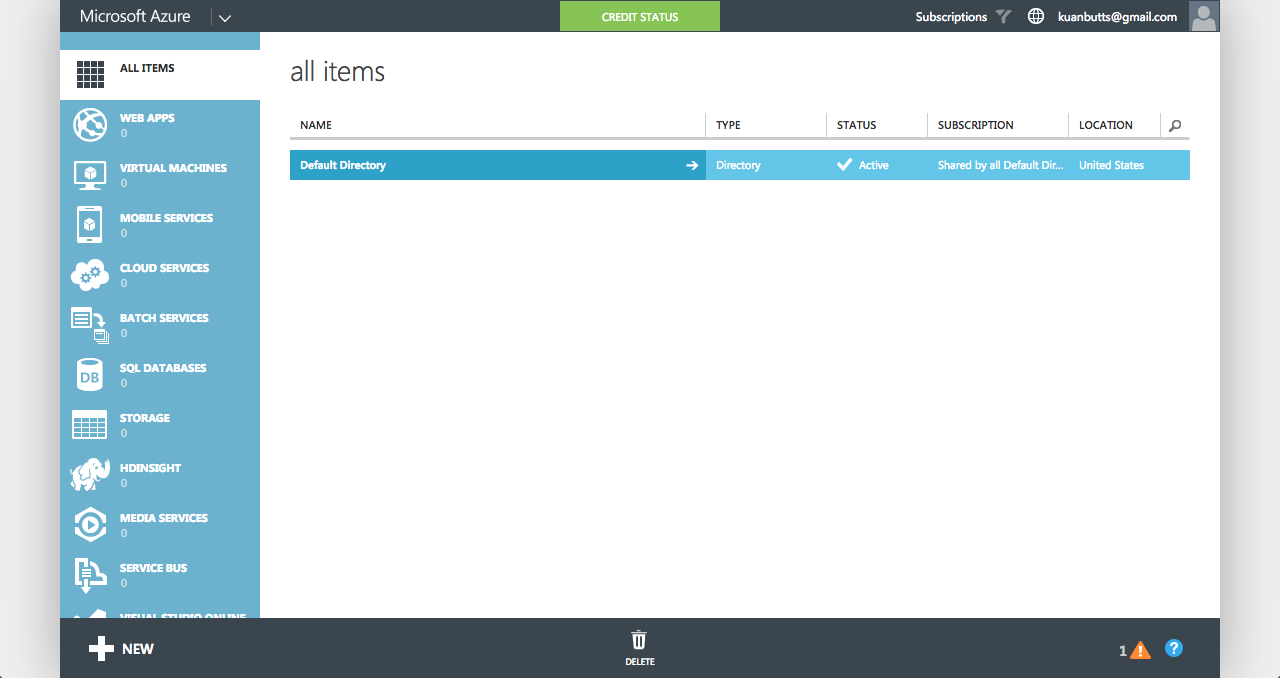
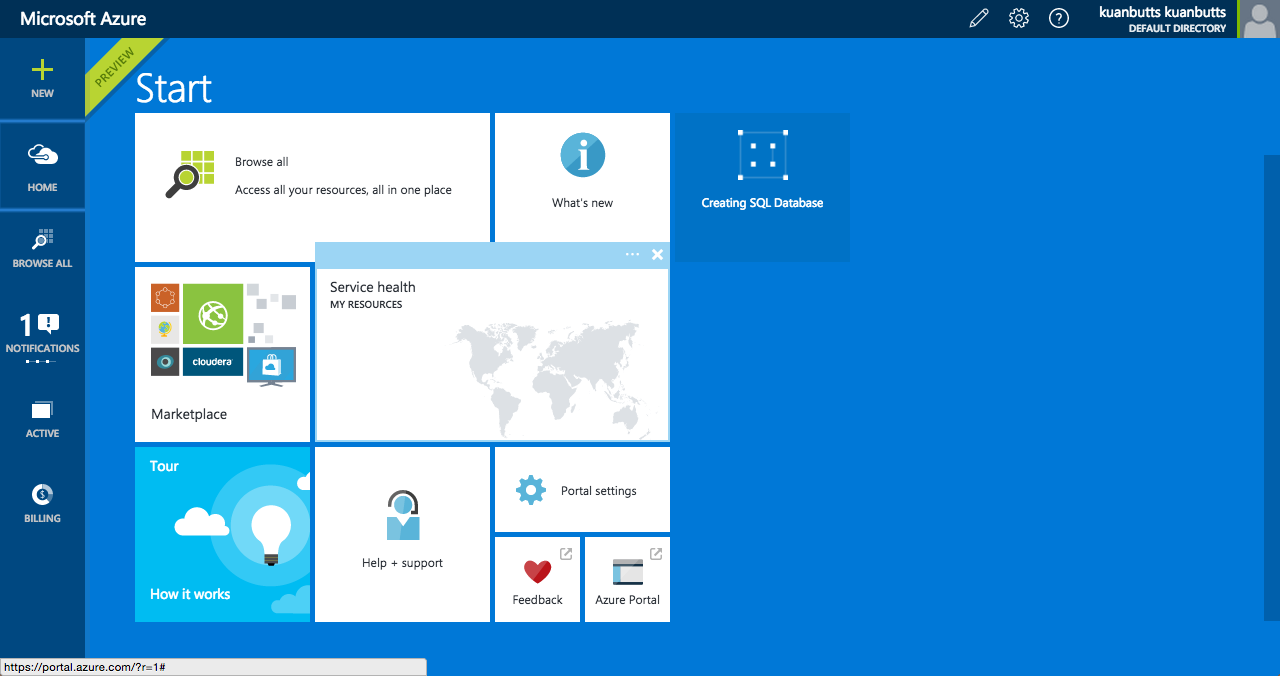
First I went to the main Windows Azure interface online (as shown above). It’s simple enough as an interface goes and perhaps better organized than AWS (in my opinion). From here I clicked on the “+ New” button in the bottom left hand corner.
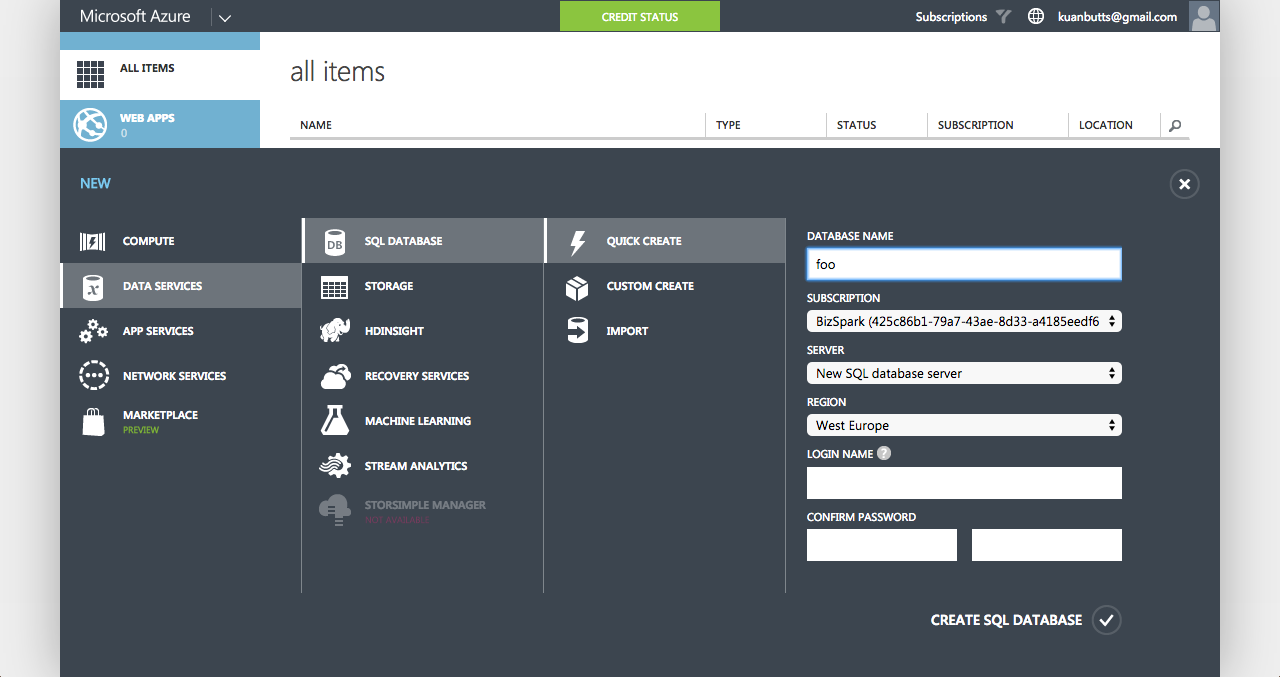
Hitting the “+ New” button pops up a bottom task panel that, if you follow the flow in the above image, will bring you to the Quick Create menu that asks you for some basic information to setup the SQL Server. This information includes a database name, server region, and login name and password. This should be easy enough.
If you click in the upper right hand corner where the generic bust / user icon is location in the above screenshot, a dropdown will come down. If you look at that dropdown, on the bottom will be a link that says, “Switch to Azure Preview Portal.” If you click that you can go to a different interface which appears to be duplicative of the current/previous Azure interface.
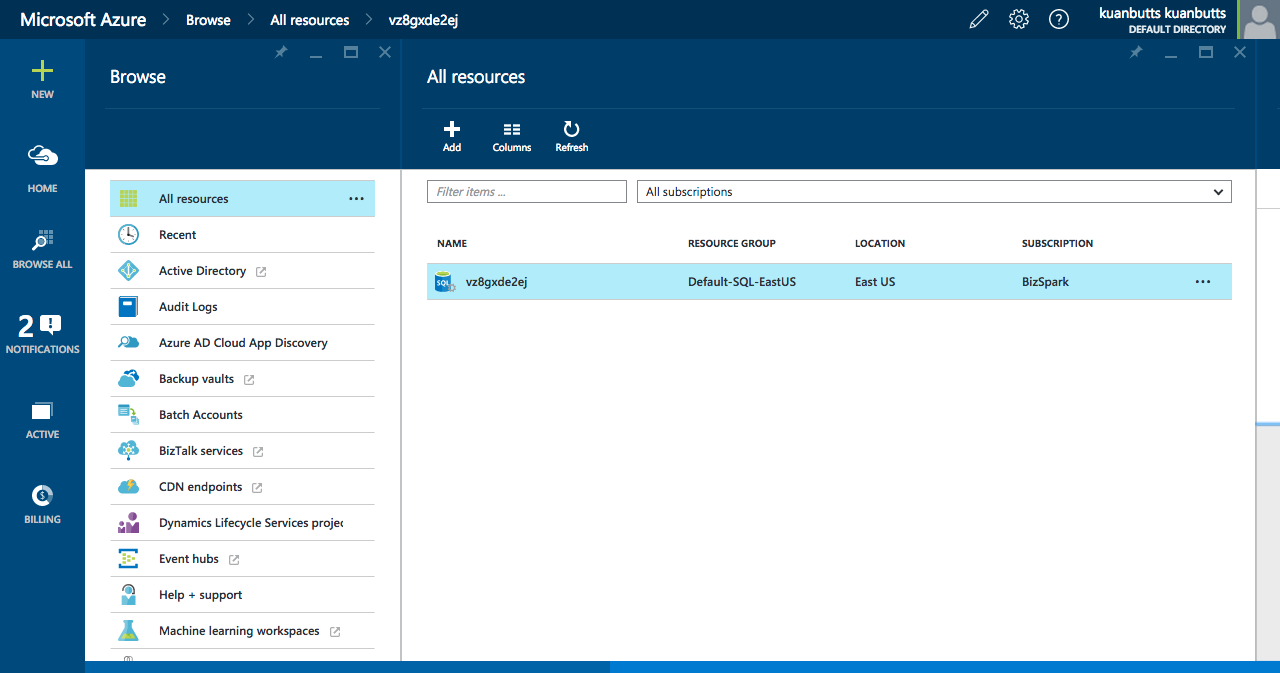
The only difference is that, there (shown above), you can see your new SQL server whereas in the prior interface you would not be able to see it (apparently it will only show databases that have been created, but not servers that are running that could hold said databases). No idea what the intent is here, but figured I should mention it. I think the “new” interface is a bit “better” in that the interface allows you a sort of desktop experience where different tasks can be in progress in “windows” and you can switch between them.
Okay now that the server is up and running we need to access it, build databases, etc. In order to do all of that, we need to be able to access it. Since I am operating under the parameter where I do not have a Windows OS device, I am going to have to use the tools which are available online for a variety of languages as well as for Linux/Mac/Windows command line interface. Once you download the CLI tool, you are going to connect the tool to your CLI subscription (just like my experiences in Heroku, etc.). What follows is an explanation of how to set up the CLI and hook it up to your Azure account. Microsoft also has their own walkthrough here and it’s fine. I’ve added my own notes just in case someone wants more detail, exposition, and a ton of screen captures to boot.
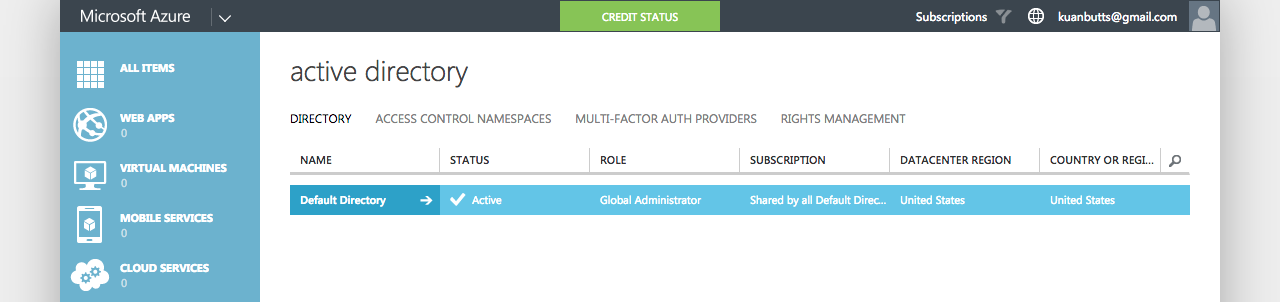
In order to use the CLI tools one must log in - but you can’t do that with your current account. You need to create a user account from the Azure dashboard and login with that user. Click on All Items on the left hand column (very top) from the first management portal at which we were. You will see a list under all items that should be one long. This row’s name value is “Default Directory” as shown in the above image. Its status should have a checkmark by it and say, “Active.” Click on this.
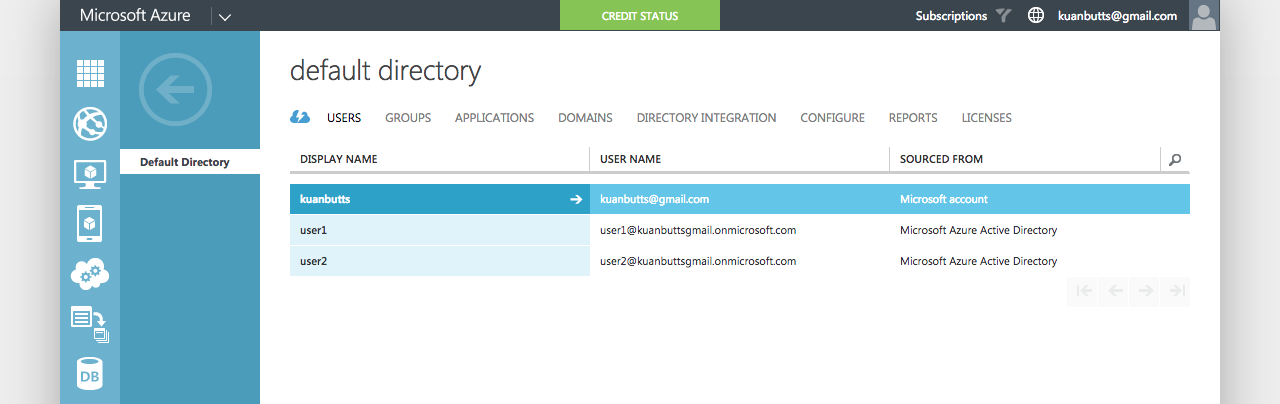 From there, you will be brought inside the default directory’s management tools. Click on “Users” from the top bar left side (see the above image, as per usual). From there, you should see one row. In my case there are three rows. The reason is that I have already created some users. In your case, you have not. Click the “Add User” button that is sitting anchored on the bottom of your screen in the dark grey div that is the width of the screen. It is located center left.
A series of cards that you work through from left to right will pop up in the middle of the screen a la a modal in Boostrap CSS frameworks (this makes me think of the XBox interface, I wonder if there is design overlap with regards to this stuff). In Card 1, make sure that the type of user is set to the default value, which is “New User in Your Organization.” Add a username and make sure the domain the default one as well (you should really only have one option here).
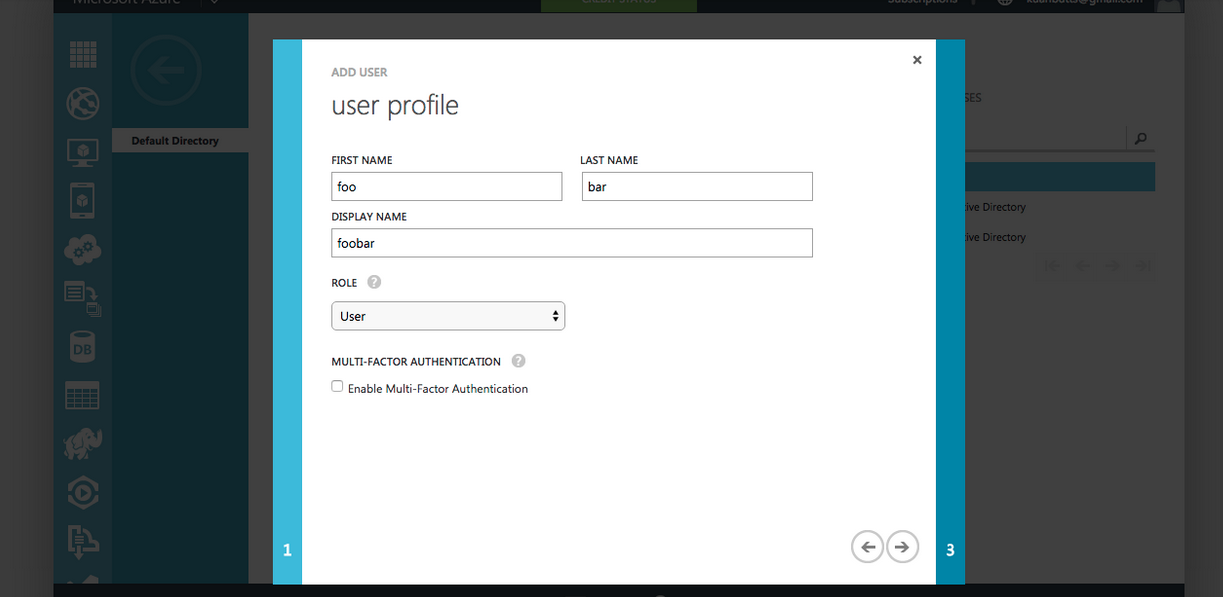
In the next card view, you need to provide a name and such. The role needs to be set at “User” and NOT “User Admin.” I made this mistake and it had me stumped for an hour or more, so make sure to just leave it at “User.” Similarly, skip the check for Multi-Factor Authentication; setting this up is enough of a headache as it is!
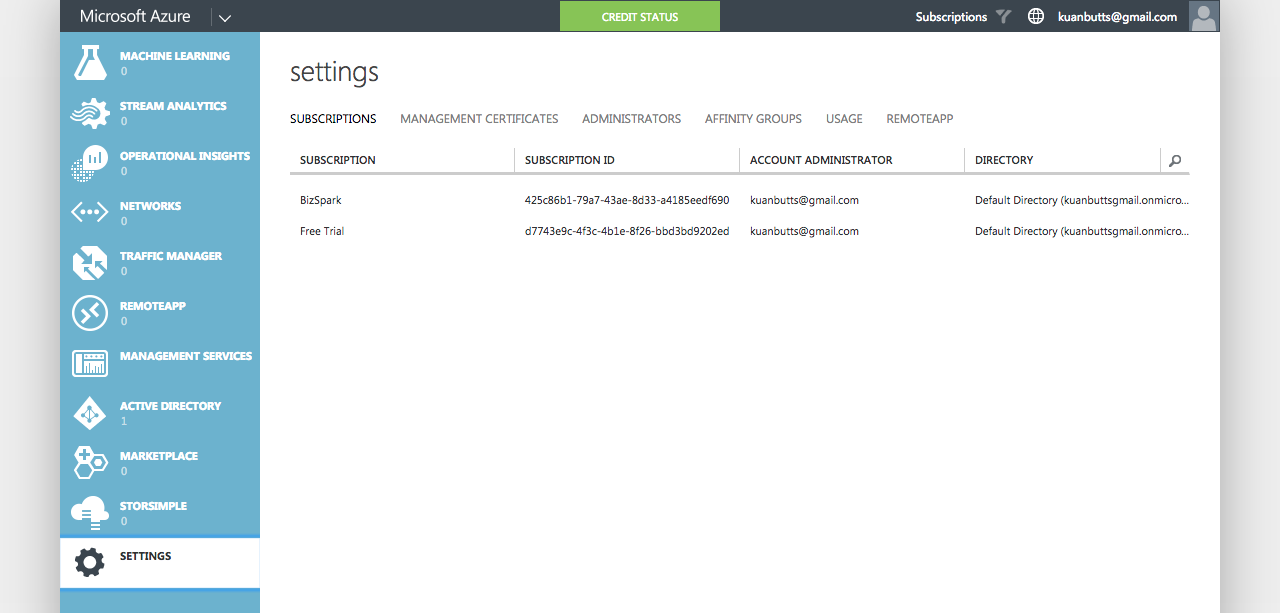
Once you’ve done the name entry, go to the next card and hit create. Write down that password it returns, you will need it soon. Now go back to the main page of the Azure management page. Go to the left items and scroll all the way down. At the bottom is an option called “Settings.” Click on this option. This will bring you to the view shown in the above image.
Click on the “Administrators” option along the top. Once there, an option will appear along the bottom called “Add.” Click it and enter the email from the account you just created. For Subscription, click BizSpark. Click the checkmark to okay this and send it along.
Now open a new incognito window. From there direct your browser to the same Azure management page. Once you are there, you need to login and it will prompt you to change the password. Do so and make sure under your settings that the subscription is showing up. If it isn’t, go back and make sure that you created the user correctly and successfully added that user.
Now we need to install the Azure CLI. If you have not already done so, there is a link here that also includes some good direction on the install. Ultimately, though, you just need to scroll down to where the link is to download the OSX tool which will put a .dmg file in your Downloads folder that you just open up and install like you would with any other program.
Once that install has succeeded, pop open a Terminal window and type in azure. Hitting enter should bring up some welcome content with a list of commands. You should now be able to login through the CLI and link the CLI tool to your Azure account. To do this, enter azure login -u foo@foobar.onmicrosoft.com, where foo@foobar.onmicrosoft.com is equal to whatever your user account is that you created. A password prompt should come in and once you enter that correctly you are in.
Entering azure account list should list the subscriptions you have (which should be just one row long with the BizSpark one). If it shows you have successfully hooked up your account to Azure. Congratulations! If it is not set to “true” under column “Current” then you can set it to current by entering azure account set subscriptionFoo where subscriptionFoo is the BizSpark subscription name.
Now that we have the CLI set up I am going to want to just set up the SQL database and configure it. That will be the end product for this particular session. A good resource for reference with regards to all the CLI commands is offered by Microsoft here.
Running azure sql will enable to you to do commands related to SQL. For example, running azure sql server list will list all the servers you have up and running. Do this now and you should see your single server you created earlier, along with the location you selected (in my case it was East US).
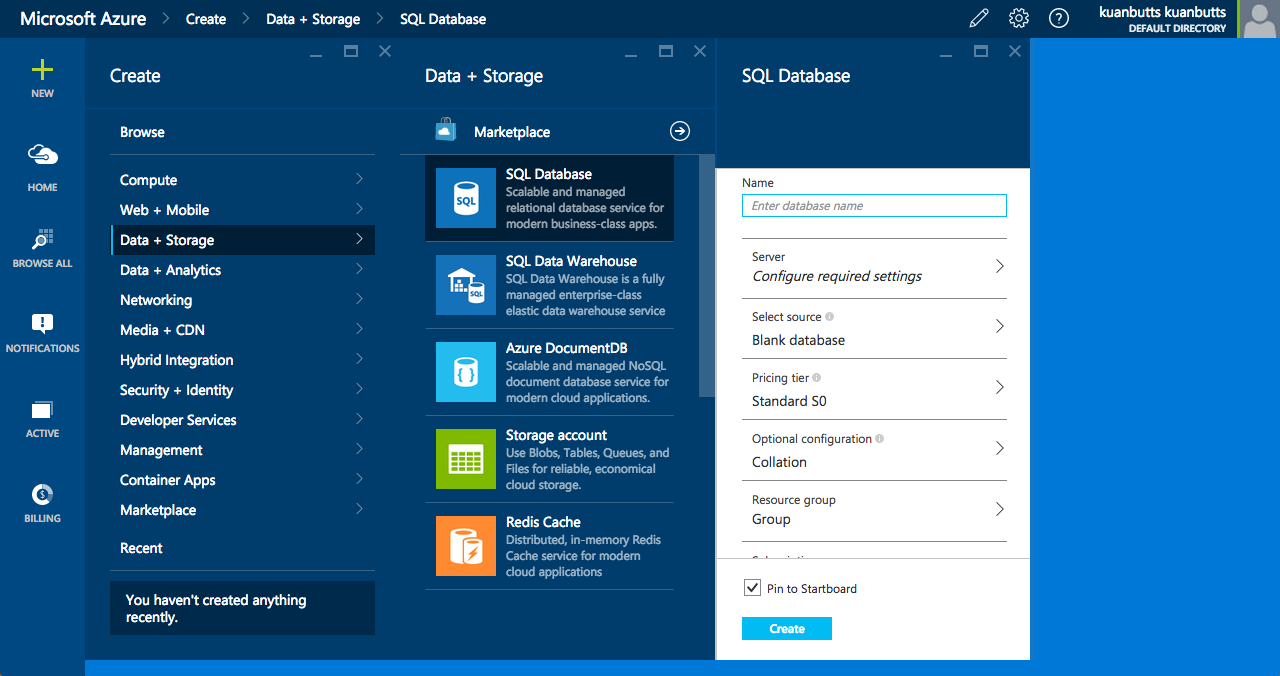
Now if you enter azure sql you will see under the list of options that you can create a database from here but, in this instance, since it is still something that we do not need Visual Studio for, I am going to take advantage of the web GUI to do it, since it’s pretty decent and a pleasure to use, at least so far. If we go back to that “alternative” portal that I was talking about earlier in this piece (which you can access under the top right dropdown menu in the main Azure management terminal), you should be able to click on the green “+” sign and go through the steps I have screen captured above to get to the SQL Database configurations and creation box as I have shown.
Under server, use the one we created earlier by selecting it from the slide out menu. Under the pricing tier, I was confused by what the differences were between the different DTU values. This Stack Overflow article was of particular help and is a suggested read if you have any questions or are confused about the DTU metric.
Once you’ve got everything selected, it should bring you back to the main page, where an animation will begin in a new “metro” box on the screen. This will animate for a little and then you should have your up and running SQL database.
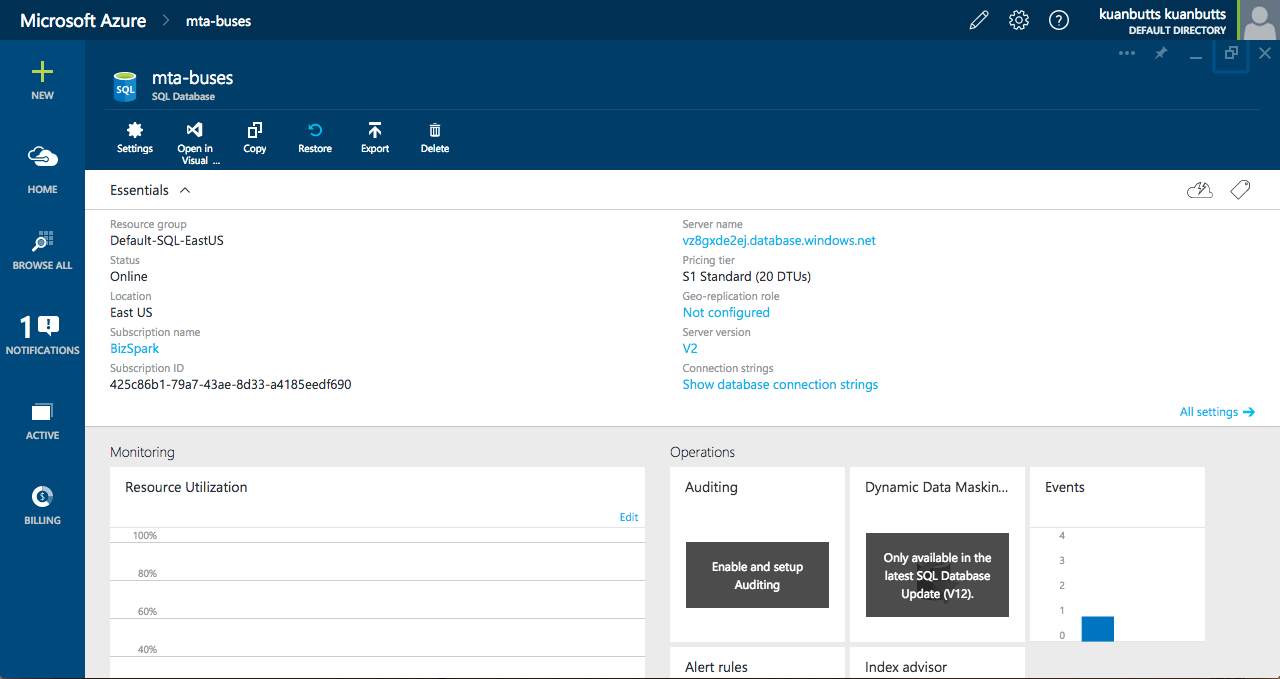
Clicking on the new box should bring you to a handy dashboard that has plenty of information about your new SQL database. It’s all fairly customizable which is impressive. Also, there are visualizations of your utilizations that are quite nice, and perhaps something Amazon might want to strive for in the future. (Though, to be honest I feel like there GUI has always been wanting and they’ve really pushed their CLI tools over their web GUI from day one.)
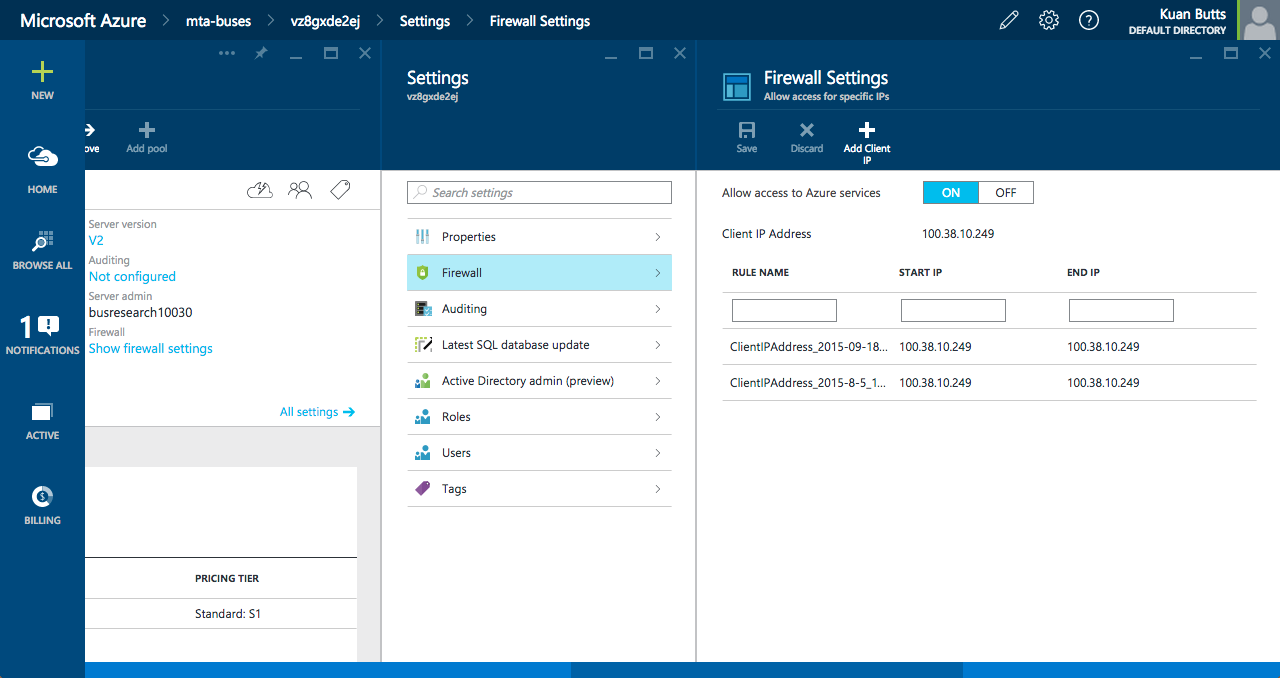 Before we can return to the CLI we need to make sure that you are not blocked from accessing the CLI input’s endpoints. That means making sure that your current IP address is not blocked. You can get to this in either of the management portals. You can see the flow in the above image for the latter one. You simply navigate to the server profile, click on settings and then in the subsequent tray select “Firewall.’ Doing so will bring up a third tray and from there you can choose to “+ Client IP” which will add your current computer’s IP and allow you to access the management tools from your CLI now.
Cool, now let’s swing back over to the CLI tools. Now that we have the SQL database established, let’s take a look at it through the CLI. Enter azure sql db list. This should bring up a series of prompts. The first is the server name, which is either a name you assigned the server or the one it was given. If you still have the screen up from the last shown screen capture, you will see that is has the a value listed for “Server Name.” In that screen capture, mine is called vz8gxde2ej.database.windows.net. The part you would need to enter in this case would be vz8gxde2ej. Next it will ask you for a login. This is the one you created for the server way back in the beginning. It is NOT your user’s ID. The same goes for the password.
If you enter these values correctly, you should receive results similar to the below:
data:    Name       Edition   Collation                     MaxSizeInGB
data:    ---------  --------  ----------------------------  -----------
data:    master     System    SQL_Latin1_General_CP1_CI_AS  5
data:    foo-names  Standard  SQL_Latin1_General_CP1_CI_AS  250
info:    sql db list command OK
Similarly, azure sql db show foo where foo is your server name should bring up a series of prompts that results in a list of metadata associated with the database. What we need to do now is open up the database and execute some SQL commands to set up tables and such.
In order to accomplish this we are going to need to be able to interface with the server through a command line interface for SQL we can drop into. The one I am currently using is called sql-cli and is available through npm. The associated README for the repository is great and includes everything you need to get it set up. Just run npm install -g sql-cli to install the tool globally. Once this has been accomplished, you should be able to access the tool from your command line by simply entering mssql.
mssql -s abcdef.database.windows.net -u username@abcdef -p thepassword -d mydatabase -eThe instructions on the Github page indicate the above method to access the database. The value associated with -s is your server so, in my case, it was that same vz8gxde2ej.database.windows.net from earlier. The username is NOT the user you created as co-administrator from the Azure management console. This is a tad confusing - it is instead the login “Server Admin” name associated with that server. The password is the one joined with that, as well. Then the value associated with -d is the database name that is associated with that SQL database you created. Completing those value entries will allow you to drop into an interface.
Now that we are here, we are able to execute scripts, create and destroy tables, whatever you want! Congrats - you made it!